> ## Documentation Index
> Fetch the complete documentation index at: https://docs.zero-x.cloud/llms.txt
> Use this file to discover all available pages before exploring further.
# 6.1 Remediation
# Cloud Security – Complete Detailed (End‑User & Admin Guide)
***
## 1. Introduction to Cloud Security Modules
This manual provides a deep, end‑to‑end understanding of Cloud Security operations. It covers onboarding cloud data sources, scanning, viewing results, understanding CSPM components, and performing remediation.
It is intended for: - **End Users** (Analysts, Security Engineers)
***
## 2. What is CSPM (Cloud Security Findings Management)?
CSPM is a security solution that continuously monitors your cloud environment to identify misconfigurations, compliance violations, security risks, and potential attack paths.
**CSPM Helps With:**
**>** Detecting insecure cloud configurations
**>** Identifying risky public exposure
**>** Monitoring excessive permissions
**>** Evaluating compliance frameworks (CIS, NIST, PCIDSS, etc.)
**>** Providing remediation steps (manual or AI-driven)
CSPM ensures that your cloud environment remains secure, compliant, and aligned with best practices.
***
## 3. Breakdown of CSPM Components
Below are detailed explanations of each security category visible after scans:
***
### 3.1 Misconfiguration
Misconfigurations occur when cloud resources are not configured according to security best practices.
**Examples:**
**>** S3 buckets allowing public read access
**>** IAM roles with overly permissive policies
**>** Security groups with open ports (0.0.0.0/0)
**>** Unencrypted storage (EBS, RDS, Blob)
***
### 3.2 Permissions (CIEM – Cloud Infrastructure Entitlement Management)
This module focuses on IAM and identity security.
**What it detects:**
**>** Excessive permissions
**>** Unused permissions
**>** Privilege escalation risks
**>** Roles/users with admin-like access
**Why it matters:**
Attackers exploit excessive IAM permissions to compromise accounts.
***
### 3.3 Public Exposure
Shows cloud assets that are unintentionally exposed to the internet.
**Examples:**
**>** Public S3 buckets
**>** Public VMs/EC2 instances
**>** Public Blob Storage
**>** Open database endpoints
**Why it matters:**
Public exposure leads to data leakage, ransomware, or unauthorized access.
***
### 3.4 Exploitable
Indicates cloud configurations that can be actively exploited by attackers.
**Examples:**
**>** Weak IAM roles + public resource exposure
**>** Misconfigured network rules with known vulnerabilities
**Why it matters:**
Exploitable items represent **high-risk** attack paths.
***
### 3.5 Vulnerability
Lists vulnerabilities (CVEs) found in workloads, VMs, containers, or cloud services.
**Examples:**
**>** Outdated OS packages
**>** Vulnerable container images
**>** Known exploitable CVEs affecting cloud workloads
**Why it matters:**
Vulnerabilities can be directly used to execute malware or privilege escalation.
***
## 4. End‑to-End Cloud Security Workflow
Below is the complete step-by-step process for both end-users and admins.
***
### Step 1 – Add Cloud Data Source (End User)
**Navigation:**
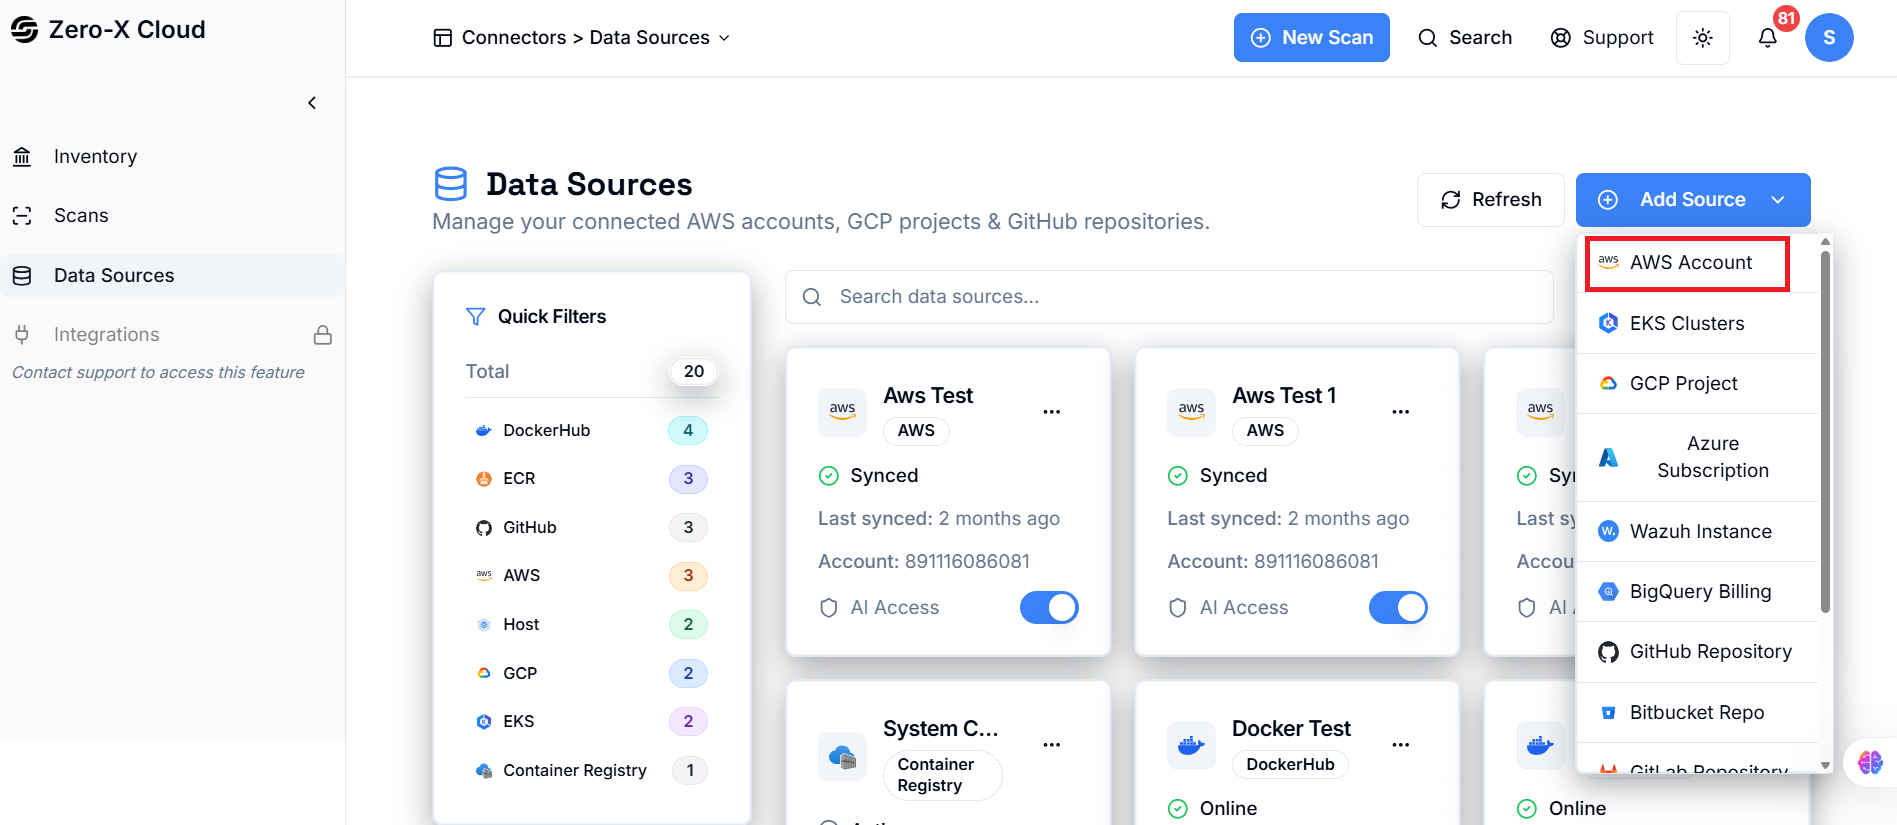
Connectors → Data Source → Add Data Source
 **Steps:**
**1.** Click **Add Data Source**.
**2.** Select Cloud Provider (AWS / Azure / GCP).
**3.** Step 1 - Enter required details (Account ID, Access Key ID, Secret Access Key, etc.).
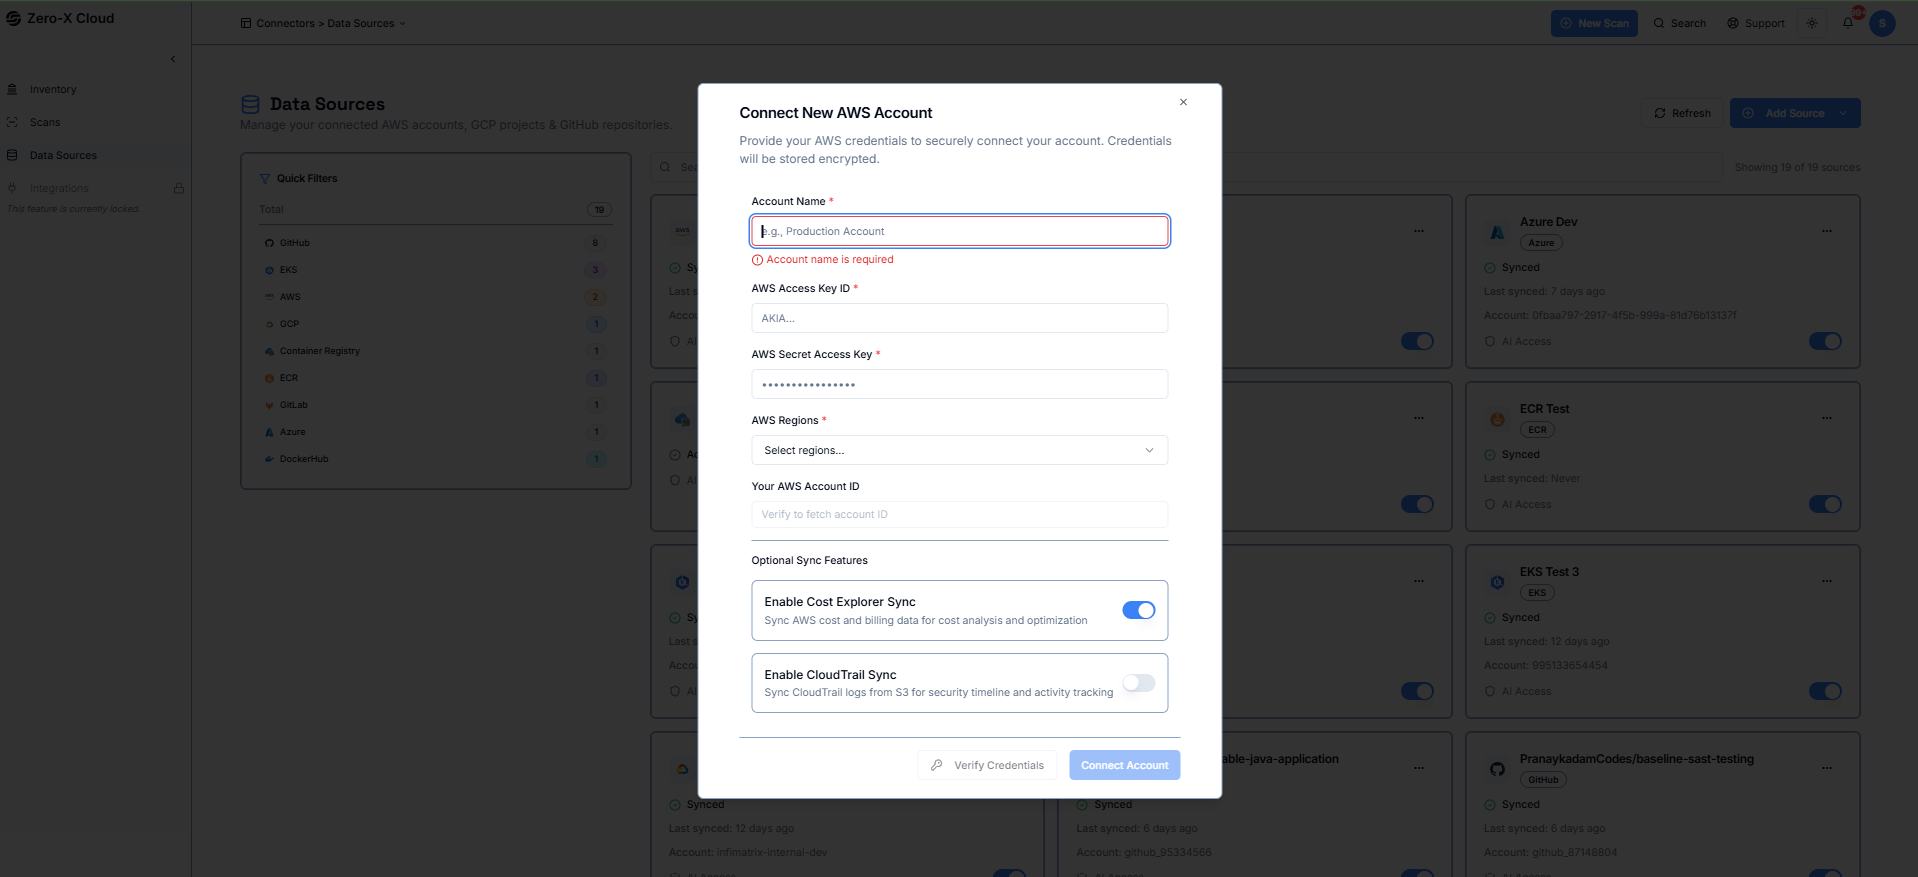 **4.** Click **Verify and Next**.
**5.** Step 2 - System Auto Sync and reflect Cloud Trail, ECR, EKS Cluster, and user can choose from dropdowns which Cloud Trail, ECR, EKS Cluster system should sync.
**6.** Once validated, click **Connect**.
**Outcome:**
**>** System triggers **Auto Inventory Scan**.
**>** System triggers **Auto Cost Scan**.
***
### Step 2 – Automatic Inventory & Cost Sync
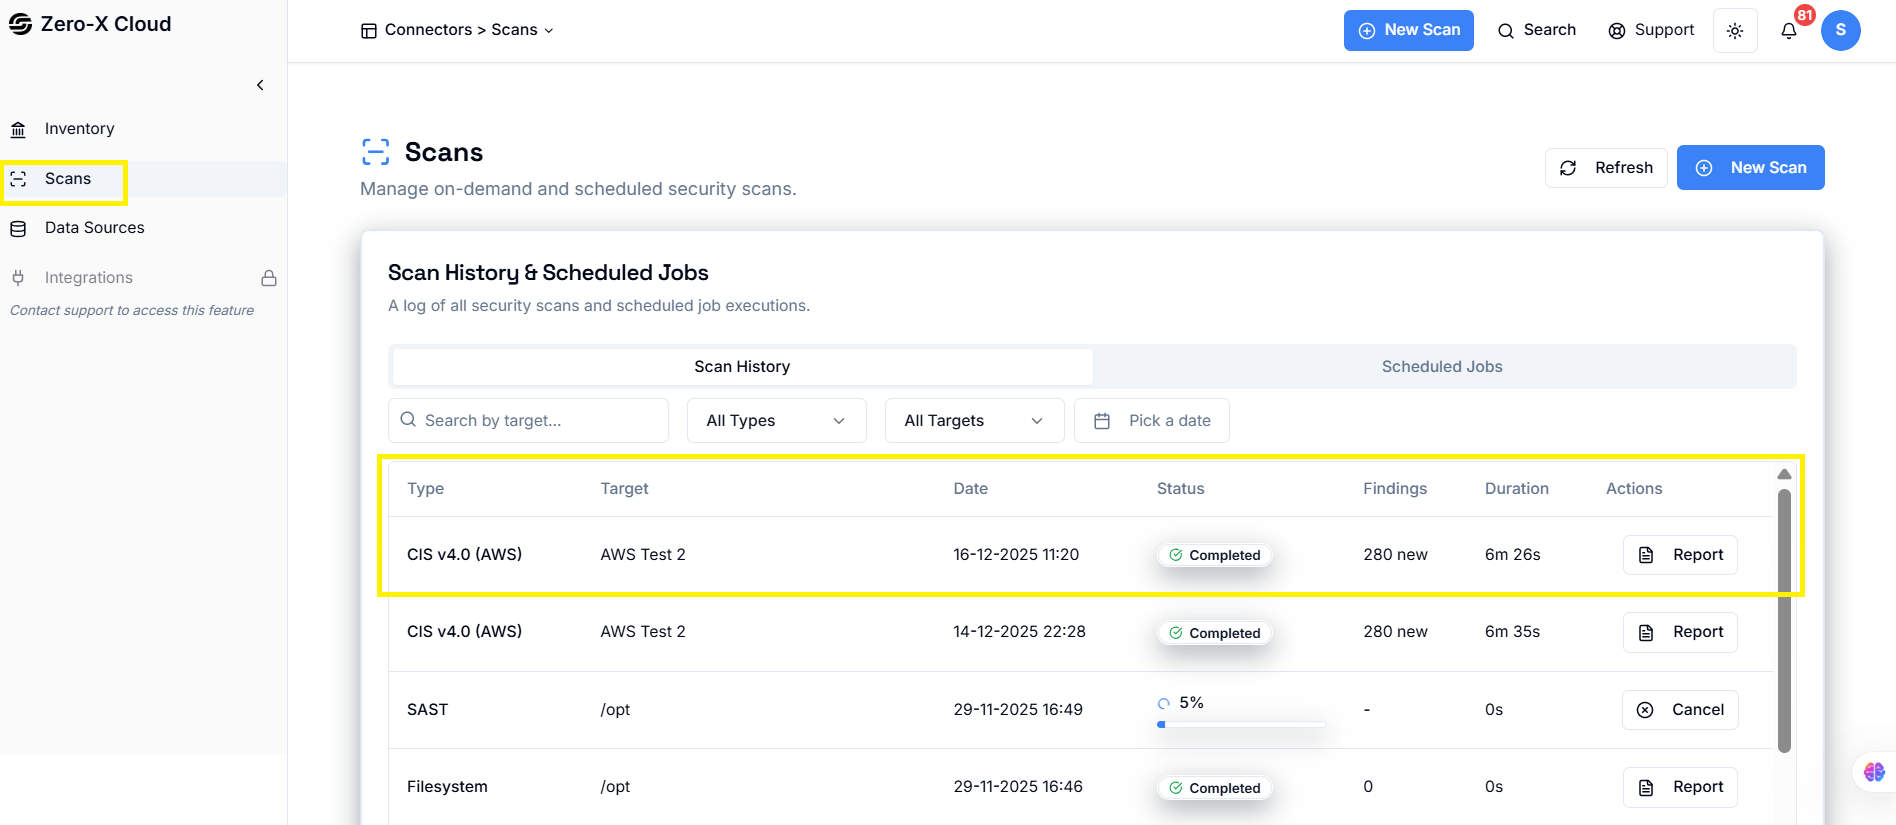 **Inventory Module:**
**>** Lists all cloud resources across all regions.
**>** Resource filtering and search become available.
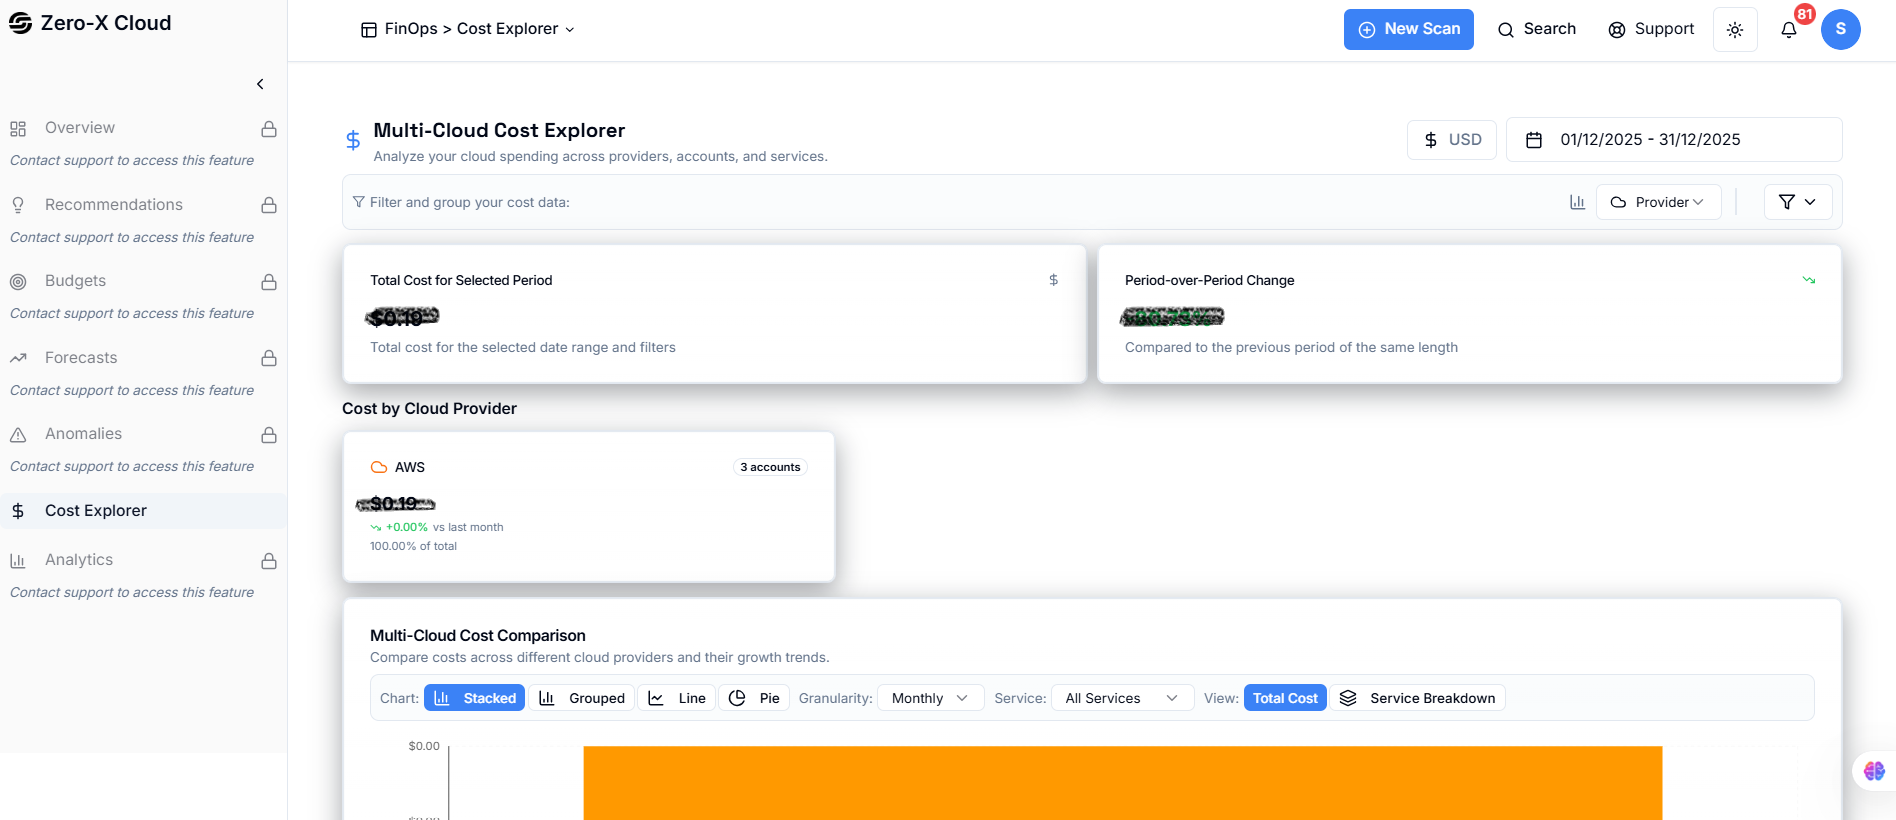
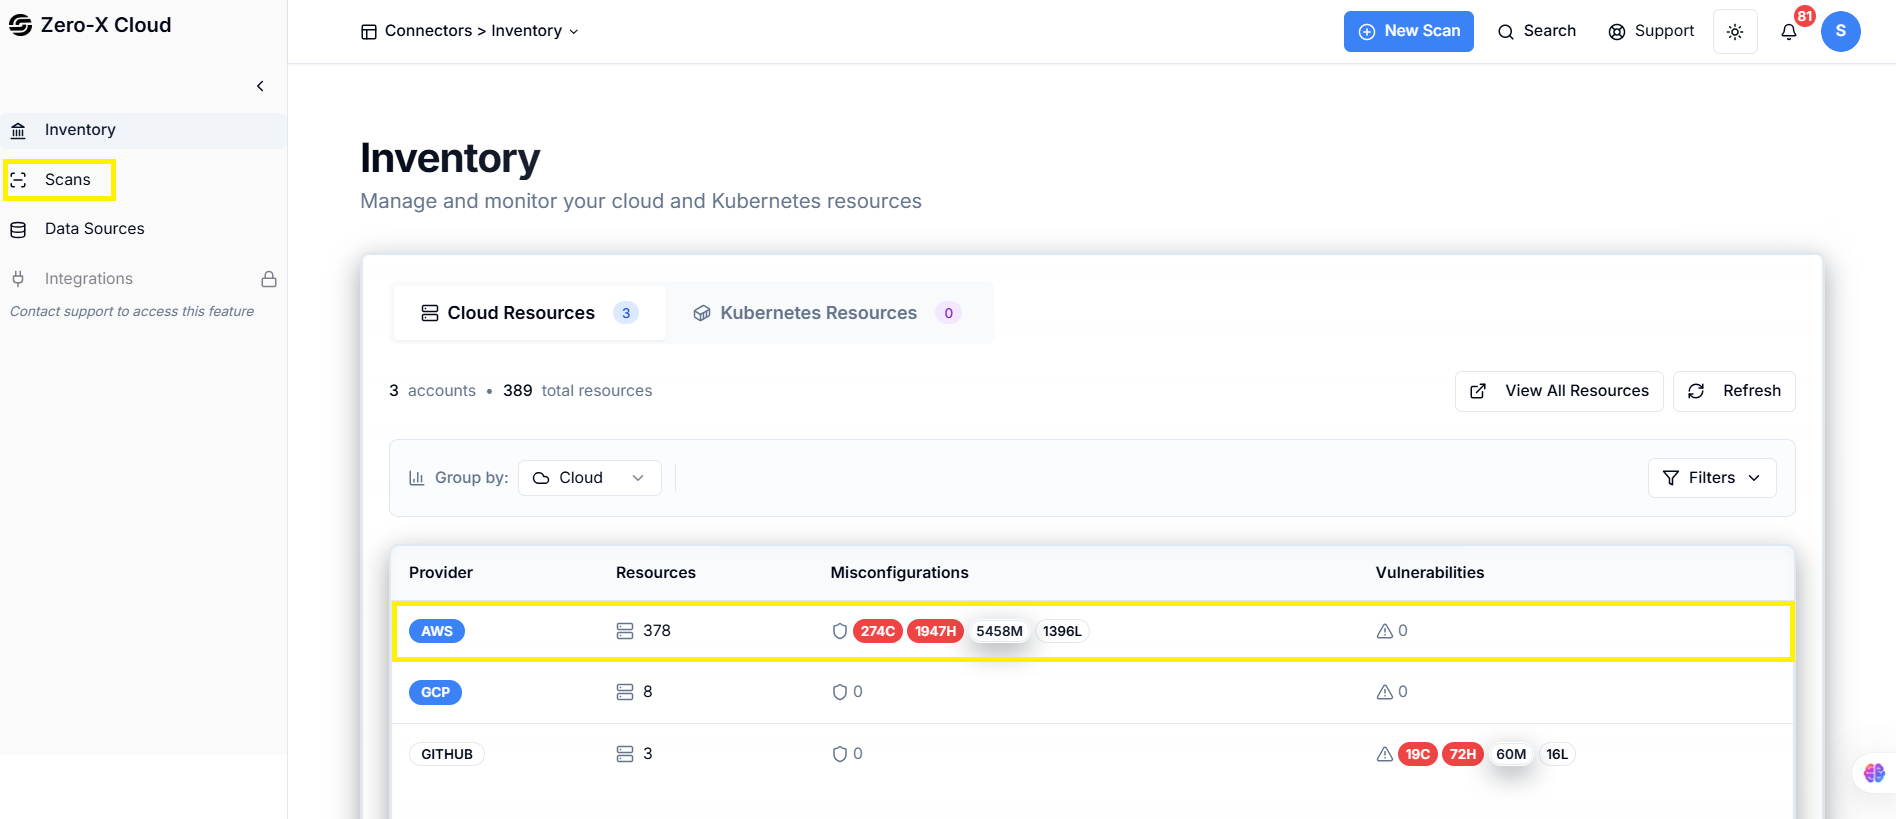 **Cost Module:**
**>** Displays total cost, service breakdown, and region-wise cost.
 ***
### Step 3 – Enable Compliances for CSPM (End User)
**Navigation:**
***
### Step 3 – Enable Compliances for CSPM (End User)
**Navigation:**
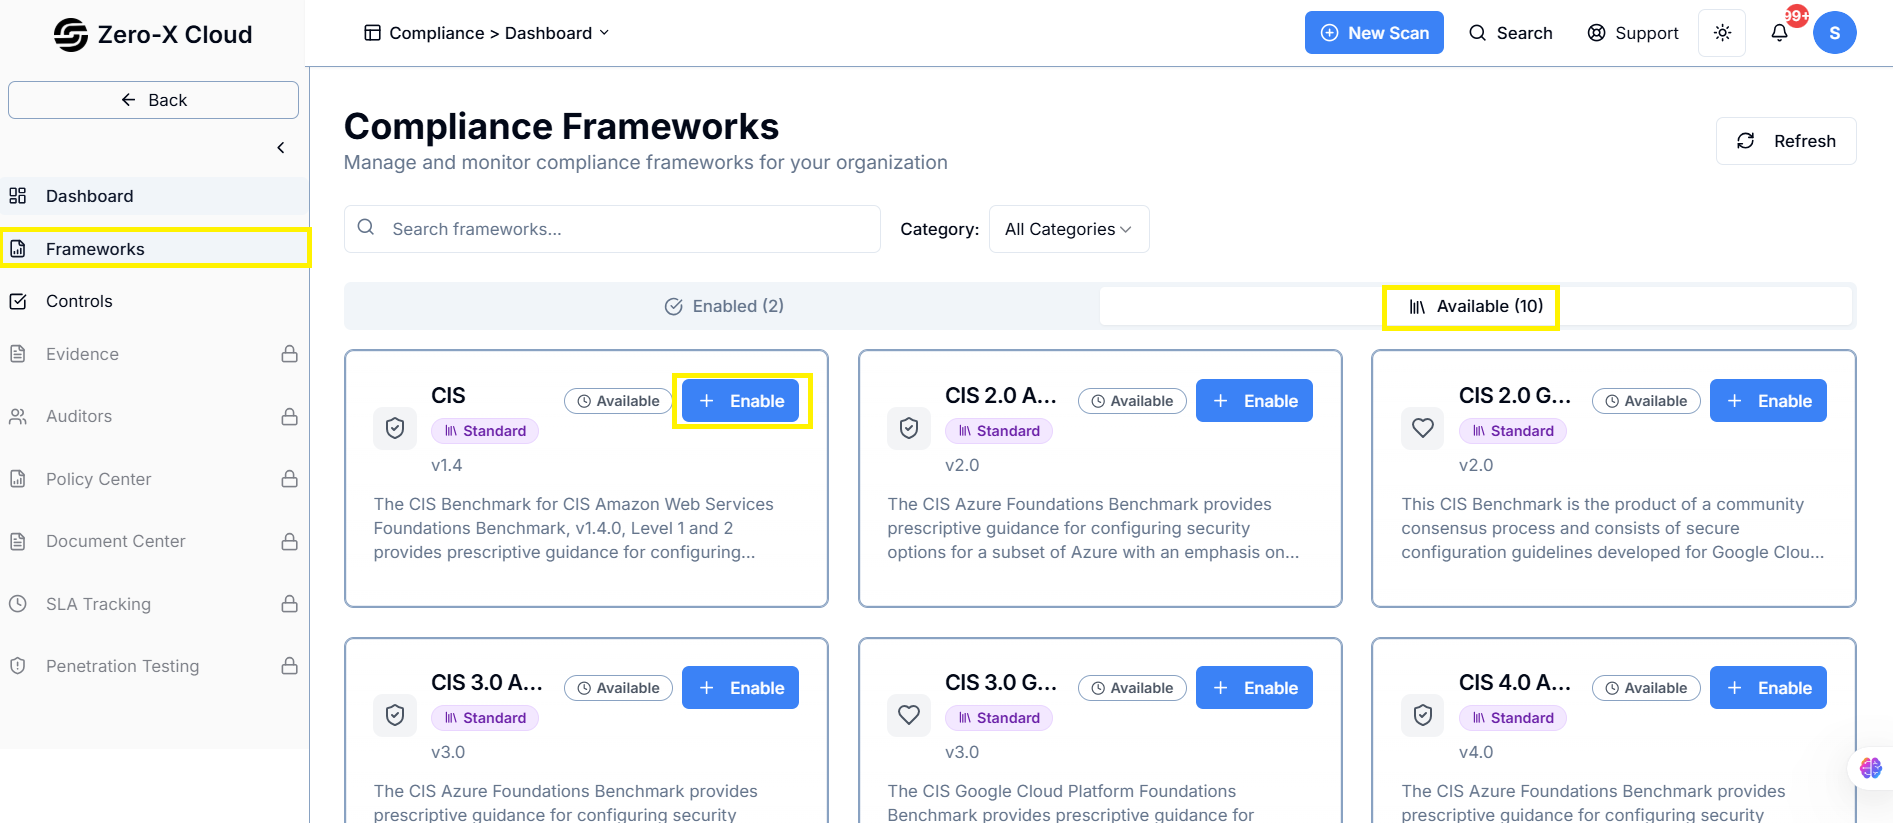
**Compliance → Available**
 **Steps:**
**1.** Open the **Compliance Module**.
**2.** In the **Available** tab, enable required frameworks.
**3.** Enabled items move to the Enabled tab.
**Outcome:**
**>** These compliances are used during CSPM scans.
***
### Step 4 – Perform a New Security Scan (End User)
### Navigation:
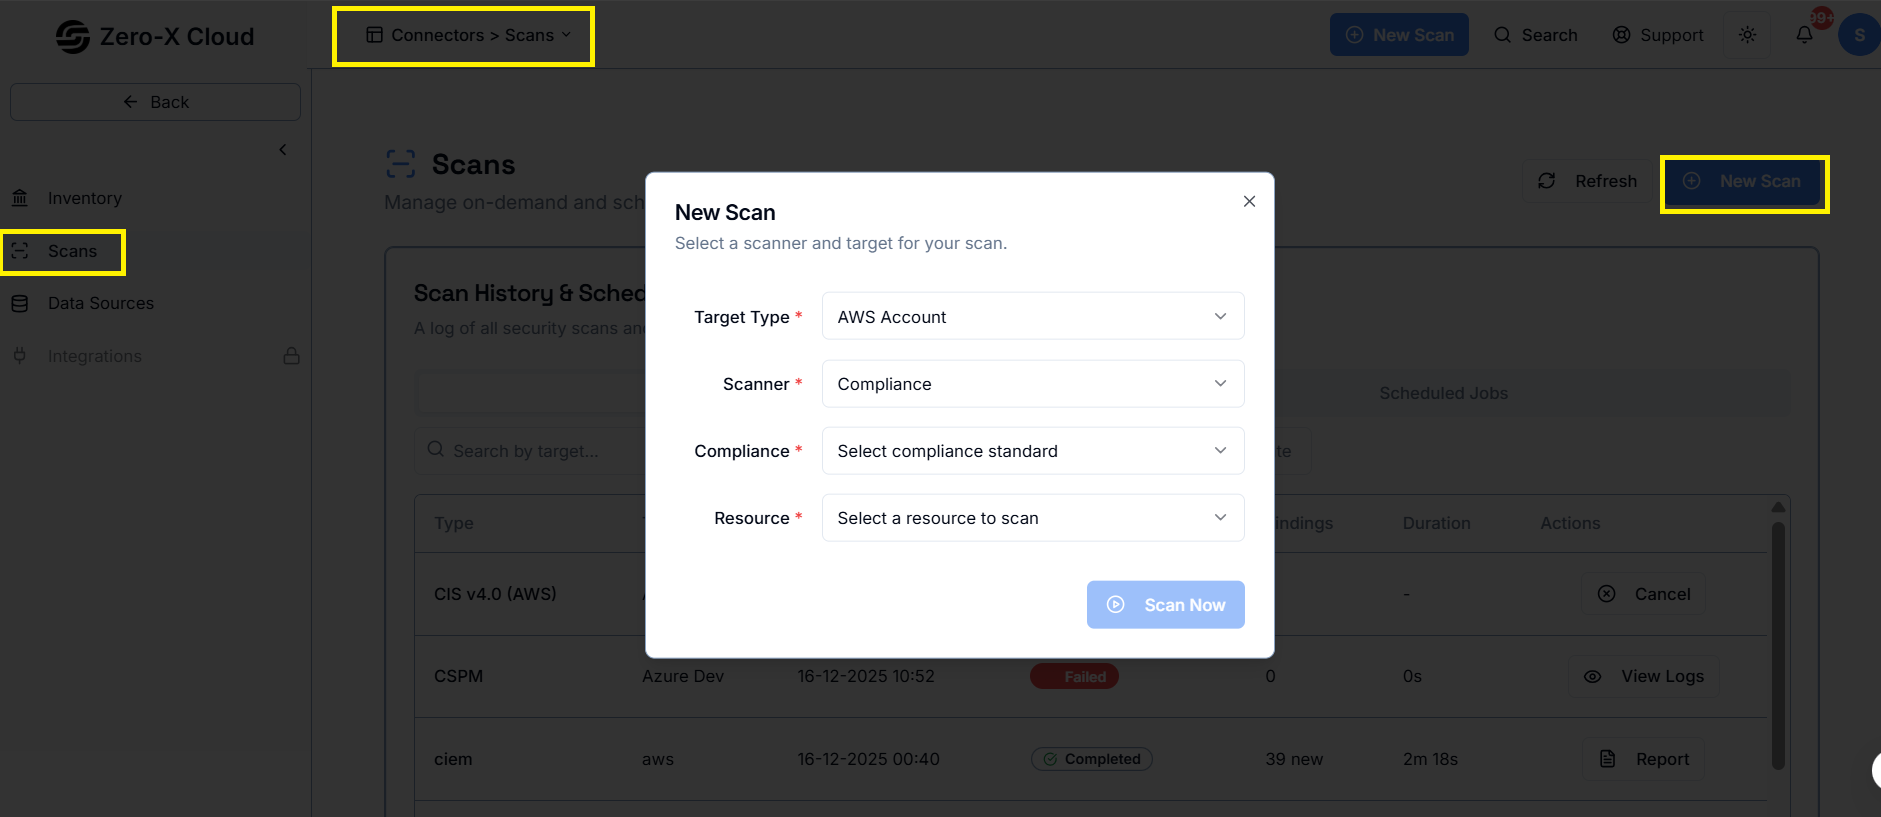
**Scan → New Scan**
 **Steps:**
**1.** Click **New Scan**.
**2.** Select:
- Cloud Platform
- Scan Type (Compliance, CSPM, CIEM, etc.)
- Account
**3.** Start Scan.
**Outcome:**
**>** Findings get generated and stored.
***
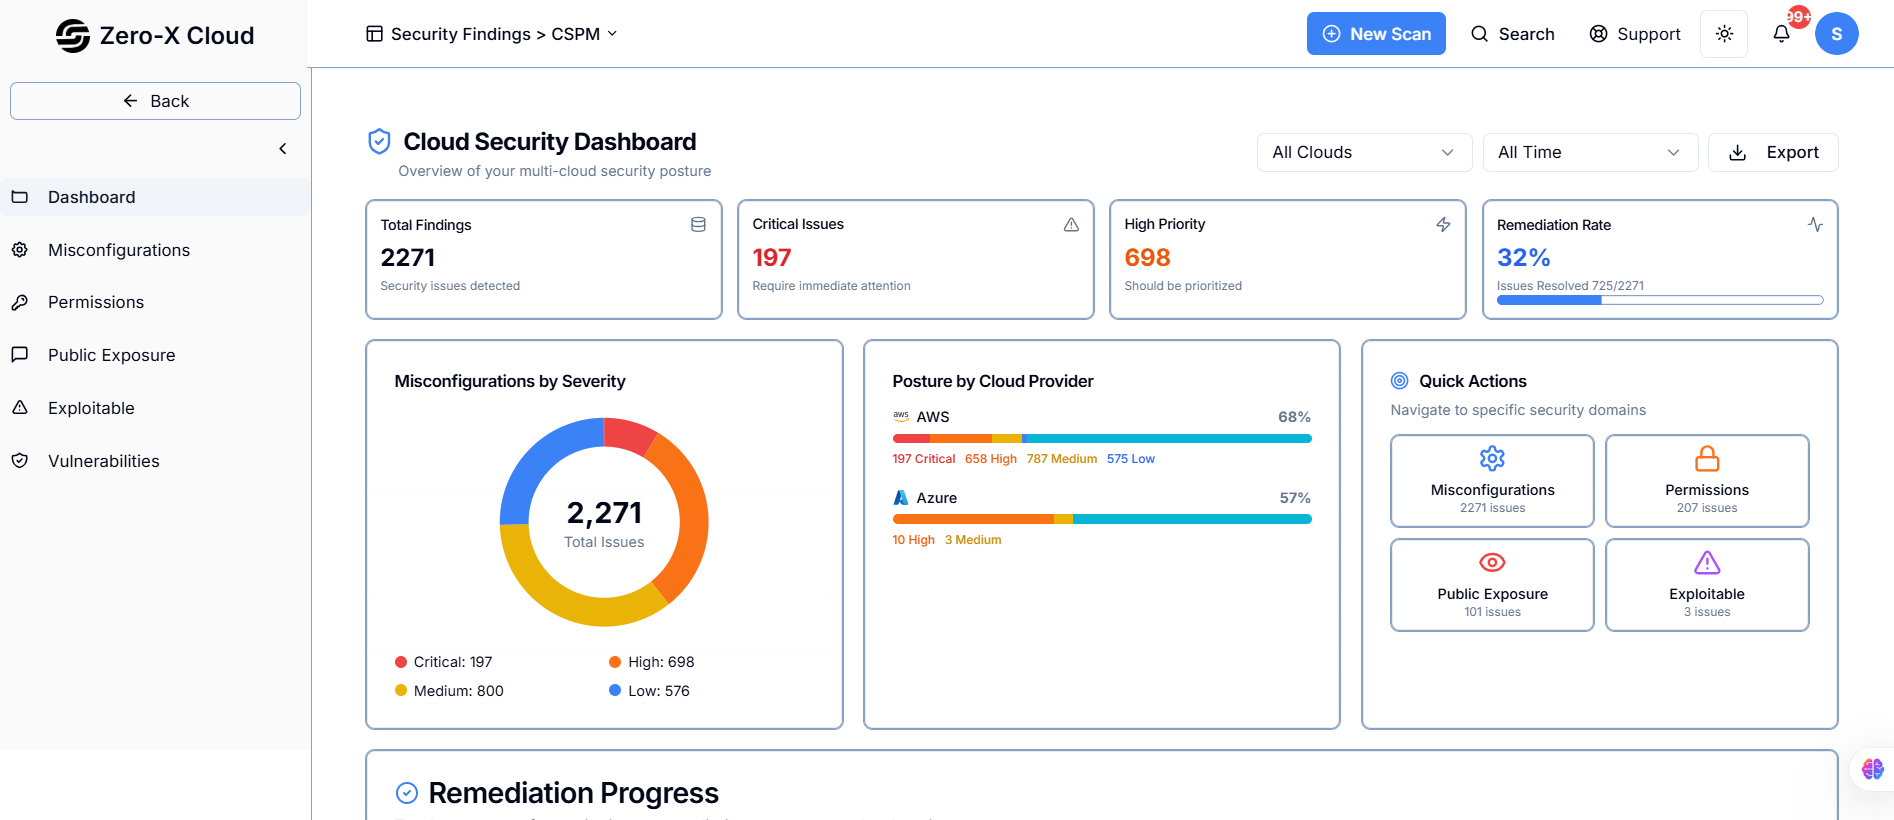
### Step 5 – View Findings Across Modules
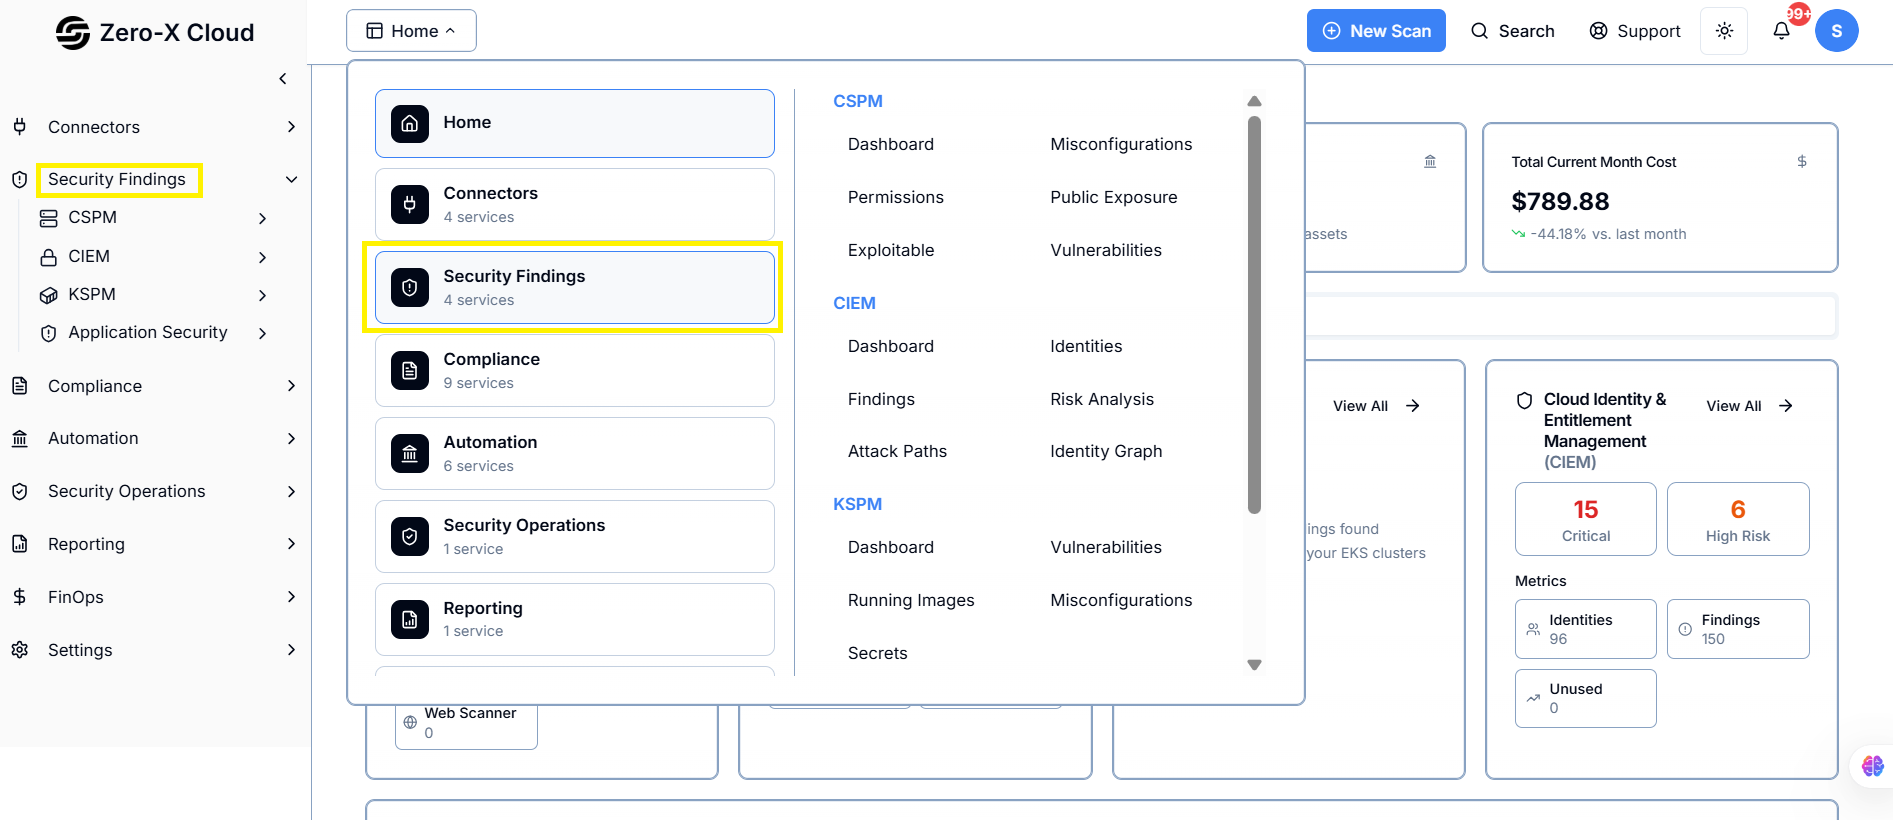
**Navigation Paths:**
**>** **Scan → Scan Results**
**>** **Security Findings → CSPM Dashboard**
**>** **Security Findings → Misconfiguration**
**>** **Security Findings → Permissions**
**>** **Security Findings → Public Exposure**
**>** **Security Findings → Exploitable**
**>** **Security Findings → Vulnerability**
 **Details Available:**
**>** Severity: Critical / High / Medium / Low
**>** Impact & Risk Summary
**>** Affected Resources
**>** Compliance Mapping
**>** Remediation Steps
 ***
### Step 6 – Remediation Options
The platform supports two remediation paths:
***
#### A. AI-Based Remediation (End User)
### Navigation:
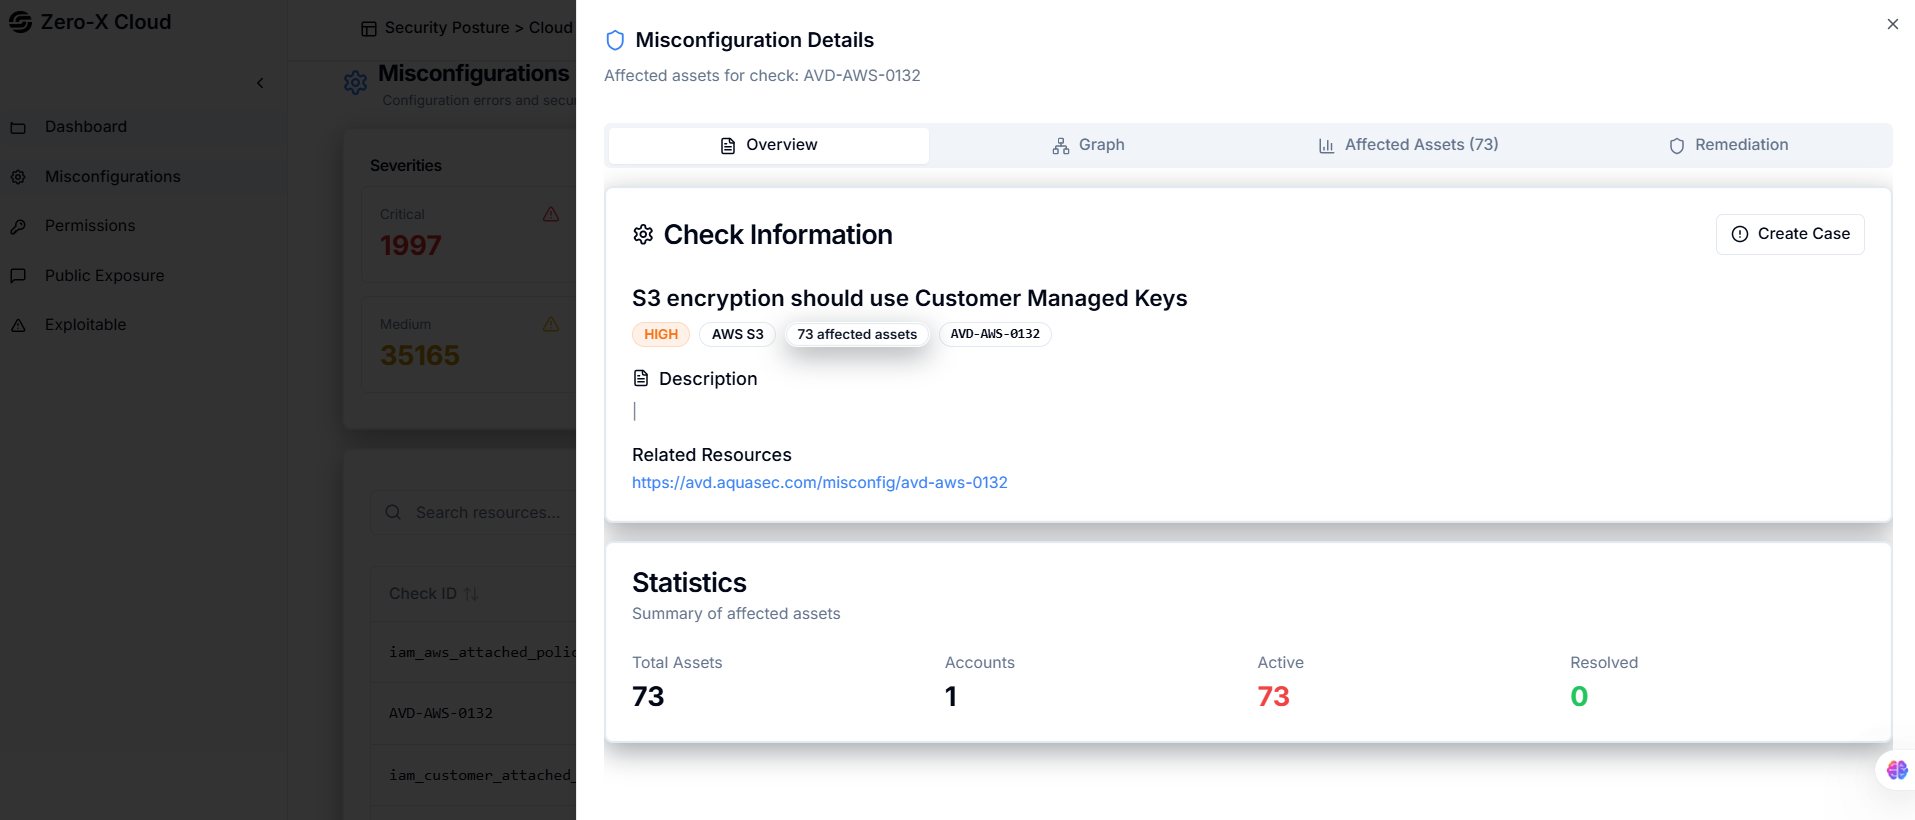
**CSPM → Misconfiguration → Select Finding → Remediation Tab**
***
### Step 6 – Remediation Options
The platform supports two remediation paths:
***
#### A. AI-Based Remediation (End User)
### Navigation:
**CSPM → Misconfiguration → Select Finding → Remediation Tab**
 **Steps:**
**1.** Open a misconfiguration finding.
**2.** Switch to **Remediation** tab.
**3.** Click **AI Generation Script**.
**4.** System generates automated remediation.
**5.** Click **Execute** to apply the fix.
**Outcome:**
**>** Issue gets resolved automatically.
***
#### B. Manual Remediation (End User Execution)
**End User Steps:**
**>** When viewing a finding:
- Go to Remediation tab.
- If a script exists for that check, the Execute button appears.
- Click Execute to remediate.